This tutorial came from an idea I had when I saw my niece wearing jeans that were far too short and had big rips in the knees. You could get very creative with the appliqué and fabric choices, but I’ll just write about what I did.
What you’ll need:
Jeans
Fat quarter or scraps of fabric for cuff
Scraps of fabric for appliqué
Wonder under for appliqué
Button for embellishment
Embroidery needle and floss
Prepare desired appliqué by ironing your fabric choices to Wonder Under or some sort of fusible web. Follow the manufacturer’s instructions. Trace and cut out shapes.

Measure pants to the desired length and cut one leg.

Fold over matching seams and making sure crotch is in the middle and cut the other leg to match. The knees were torn badly on these jeans otherwise I might have made them capris.

Cut a 2” strip of fabric double the width of the bottom of the pant.

Sew the strip right sides together to measure the circumference of the pant leg. Iron seam open.

Mark lines one inch above the bottom of the pant leg.

NOTE* If you are doing a flower like I did then you’ll need to iron on the stem before you attach the cuff. Place the bottom of the stem on top of the line you just marked.

Pin your strip of fabric right side down with the bottom of the strip matching up on the line. Match the seam of the strip to the inside seam of the pant. There should be an inch of jean showing beneath. (See picture).

Stitch 1/4” seam around pant leg.

Turn strip and press toward bottom of pant leg. Turn pant inside out and press 1/4” under, roll and press another 1/4". Pin in place.

Stitch 1/4" seam around pant leg.

Do the same to the other leg.
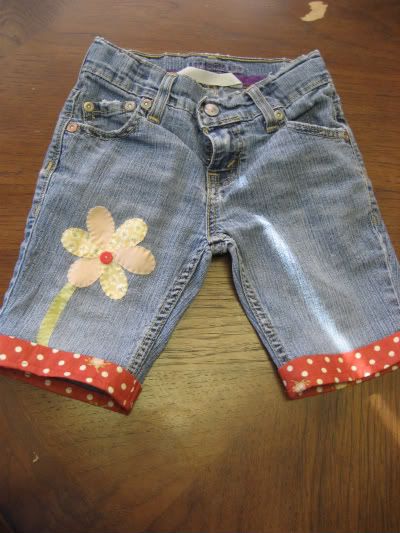
Iron on prepared appliqué. Don’t be afraid to get creative! I hand stitched around the edges of the appliqué to add some personality and to keep the edges from fraying too much in the wash. I also added a button to the middle of the flower.

Ta Da!!! Now sit back and admire your work before those jeans head outside and get very dirty.

Have fun and please leave pictures below of your reconstructed jeans!